
How to Add Someone to GitHub Repository: A Friendly, Complete Guide
Picture this. You’ve spent three weeks building something. A project that actually works, that you’re genuinely proud of. Now you want to bring someone else in — a friend, a teammate, a freelance developer you just hired. And suddenly you’re staring at GitHub’s settings page, unsure where to click next.
Or maybe you’re a teacher adding students to a shared repo. Maybe you’re a designer who just joined a software team and someone asked you to “check your email for the GitHub invite” and you have absolutely no idea what they mean.
Wherever you’re starting from, this guide is for you. Let’s walk through this together.
Key Facts
| Topic | Key Detail |
| When did GitHub launch? | April 10, 2008 — founded by Tom Preston-Werner, Chris Wanstrath, and PJ Hyett |
| How many developers use GitHub today? | Over 150 million worldwide |
| How many repositories exist on GitHub? | Over 420 million |
| Is it free to add collaborators? | Yes — unlimited collaborators on public and private repos under GitHub Free |
| Where do you add collaborators? | Repository Settings → Access → Collaborators |
| How does the invitation work? | GitHub sends an email; the person must accept before gaining access |
| How long do invitations last? | After seven days, you will have to send it again. |
| What are the five permission levels? | Read, Triage, Write, Maintain, Admin |
| What’s the safest default? | Read or Write — only grant Admin when truly necessary |
| What’s the difference between personal and org repos? | Personal repos add individual collaborators; organization repos use Teams for scalable access |
| Can you add someone via GitHub CLI? | Yes — using a PUT request to the GitHub API |
| When did private repos get unlimited collaborators? | April 2020 — GitHub made this free for everyone |
How GitHub Came to Be About Collaboration
Git itself was born in 2005, almost by accident. Linus Torvalds — the same person who created the Linux operating system — needed a new version control system urgently. The tool his team had been using, BitKeeper, revoked its free license after a dispute. According to reports, Torvalds created Git from scratch after going offline for around a week. It was fast, decentralized, and technically brilliant. But it was also extremely unfriendly to anyone who didn’t already live in the command line.
Two years later, in a coffee shop in San Francisco’s SoMa neighborhood, Tom Preston-Werner and Chris Wanstrath started talking about this problem. Git was powerful, but the barrier to actually using it with other people was too high. The solution they sketched out became GitHub.
They built it nights and weekends while keeping their day jobs. PJ Hyett and Scott Chacon joined them. GitHub went live in February 2008, launched publicly in April, and by the end of its first year hosted over 46,000 public repositories and 100,000 users. In 2011 it passed one million repositories. In 2018, Microsoft bought it for $7.5 billion.
The whole story of GitHub is really the story of making collaboration possible for people who wouldn’t have managed it otherwise. That’s not a small thing. According to Tom Preston-Werner, the idea was “boundaryless collaboration”—that is, it didn’t matter who you were, where you lived, or what school you attended. What mattered was the code. What mattered was working together.
Adding someone to your repository is, in a small and practical way, exactly that idea in action.
See also “How to See Deleted Instagram Messages: The Honest Guide“
What Happens When You Add a Collaborator
When you add someone to your GitHub repository, you’re giving them an invitation — a formal request that they have to accept before anything changes. Until they click “Accept,” they show up in your Collaborators list as “Pending Invite.” Their access hasn’t begun yet.
Once they accept, they can do things in your repository based on whatever permission level you chose. That permission level is the most important decision you’ll make in this whole process.
Think of it like handing someone a key to a building. You’d give a delivery person a key to the lobby. You’d give a long-term employee a key to their office. You’d only give someone a master key if you trusted them completely and they genuinely needed it.
GitHub’s five permission levels work the same way.
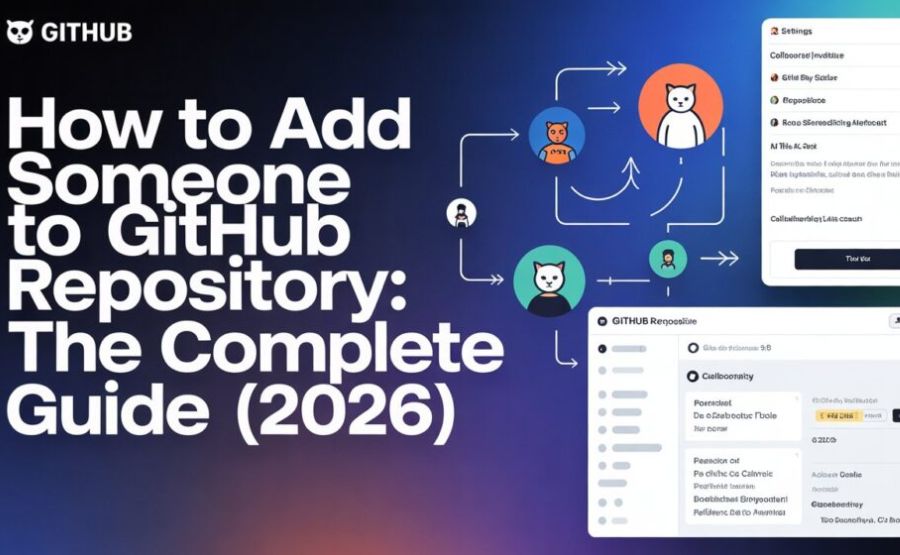
Understanding the Five Permission Levels
Reading is the most limited. Someone with Read access can see your code, clone it, leave comments on issues, and not much else. They can’t change anything. This is perfect for a client who wants to review your work, a teacher checking a student’s project, or anyone who just needs to observe.
Triage gives a bit more. This person can manage issues and pull requests — label them, close them, reopen them — but they still can’t push any code. If you have someone helping coordinate a project without writing code themselves, Triage is a good fit.
Write is the standard choice for active contributors. They can push code, create branches, and open pull requests. This is what you’d give a developer who’s actively building alongside you.
Maintain is a step above Write. This level is designed for people who help manage the project — they can handle most administrative tasks around releases and branches, but they can’t touch the most sensitive settings.
Admin gives full control, including the ability to delete the repository and manage all settings. Only give Admin access to people who genuinely need it and who you trust completely.
A really common mistake is defaulting to Admin for everyone because it’s easier. Resist that. Giving someone more access than they need is a security risk, and it’s one that’s surprisingly easy to avoid with just a few extra seconds of thought.
Adding a Collaborator to a Personal Repository: Step by Step
This is the most common situation. You own a repository under your personal GitHub account, and you want to add one or more people to it.
Start by going to your repository on GitHub. Look for the Settings tab at the top of the page — it’s usually the last option in the row. If you can’t see it, try clicking the three-dot dropdown at the right end of the navigation. The Settings tab is only visible to people with Admin access, so if you can’t find it at all, you may not be the owner of the repository.
Once you’re in Settings, look at the left sidebar. Find the section called Access. Under it, click Collaborators.
GitHub may ask you to confirm your identity before proceeding — a password prompt or a two-factor authentication check. This is just GitHub making sure it’s really you before you make changes to who has access.
On the Collaborators page, click the green Add people button.
A search box appears. You can type in the person’s GitHub username, their full name, or their email address. As you type, GitHub will suggest matching accounts. Click the name of the person you see.
Next, a dropdown menu will allow you to select their degree of permission. Select the appropriate one. Then click the final confirmation button — something like Add [username] to this repository.
GitHub sends them an email invitation right away. They’ll also see a notification inside GitHub at github.com/notifications. They need to click “Accept invitation” for their access to begin.
That’s the whole process. It takes about two minutes once you know where everything is.

What the Invited Person Experiences
It’s worth thinking about this from the other side for a moment.
The person you invited gets an email from GitHub saying they’ve been invited to collaborate on a repository. There’s a button in the email to accept. If they click it, they land on GitHub and can confirm their access. Done.
If they don’t check their email — or if the invitation ends up in spam, which happens a lot the first time — they won’t see it. The invitation expires after seven days. If that happens, you can resend it from the Collaborators page.
Rather than using email, you can also send them the direct invitation link. On the Collaborators page, next to their pending invite, there’s usually a way to copy the link and send it to them directly through a chat or text message. This is often faster for people who aren’t checking GitHub notifications regularly.
Adding People in a GitHub Organization
If your repository belongs to a GitHub Organization — a company account, an open source project, a school team — the process looks a little different and has more options.
Organizations have their own member system. You can invite someone to the organization as a whole, or you can add them as an “outside collaborator” to a specific repository without making them a full organization member.
The more scalable approach is using Teams. A Team is a named group inside your organization.You grant the Team access to one or more repositories.Then when you add people, you add them to a Team — and they automatically inherit all the access that Team has.
Here’s why that matters practically. If you have a “Backend Developers” team with Write access to four repositories, and you hire a new backend developer, you add them to that Team. One action, and they have exactly the right access to exactly the right repositories. No need to manually set permissions on each repo individually.
For organizations, you add outside collaborators by going to your organization’s settings, finding the Repositories or Teams section, and inviting them directly to a specific repository.They don’t become full members of the organization, so unless you specifically allow it, they can’t view other repositories or organization-wide settings.
One thing to be aware of: on some paid GitHub plans, adding outside collaborators to private repositories may use a license seat. Before inviting a large number of individuals, it’s important to review the specifics of your strategy if you’re in charge of a team with a limited budget.
The Security Side of This Decision
Here’s something worth pausing on. Approximately 68% of data breaches involve a human element, according to security research. On platforms like GitHub, misconfigured access permissions are one of the most common ways that code gets exposed, modified without authorization, or lost.
This doesn’t mean you should be paranoid about adding collaborators. It means you should be thoughtful.
A few practices that genuinely help: Only grant the permission level someone actually needs. Regularly review your Collaborators list and remove people who no longer need access — former contractors, students who graduated, team members who moved to other projects. Consider requiring two-factor authentication for collaborators on sensitive repositories.
For repositories with important or sensitive code, use protected branch rules. These rules prevent anyone from directly pushing changes to your main branch without going through a pull request and review. This protects your code even if a collaborator makes an error, and it makes the whole collaboration process more structured and deliberate.
None of this has to be complicated. It’s just the habit of keeping your digital door appropriately locked — open to the people who need to walk through, secure against everyone else.
Common Misconceptions
One thing that surprises a lot of people: making a repository public does not mean you’ve added anyone as a collaborator. A public repo lets anyone read and clone your code. However, only those you have specifically invited are able to manage problems, push changes, and view confidential information. The public is about visibility. Collaborator access is about permission to act.
The other common confusion is between forking and collaborating. When someone forks your public repository, they make their own copy of it under their account. They can work on that copy freely. If you want their changes merged back into your repository, they submit a pull request, and you choose whether to accept it. This is how most open source contributions work. You’re not adding them as a collaborator at all — you’re just reviewing their suggested changes.
Forking is for open source style contributions from people you might not know. Adding as a collaborator is for trusted team members you’re actively working with.
The Broader Picture: Why This Small Action Matters
There’s something quietly significant about what happens when you add someone to a repository.
GitHub was built explicitly on the belief that collaboration shouldn’t require being in the same room, the same city, or the same company. The founders thought the barrier to working together was too high, and they wanted to lower it. The invitation email you send is the practical expression of that idea.
Open source software — the code that powers most of the internet, including Linux, Python, and thousands of tools you use without knowing — exists because of this model. Developers all over the world contribute to projects owned by people they’ve never met, speaking languages they might not share, across time zones that make synchronous communication nearly impossible. The collaborator invitation is where it all starts.
That’s not meant to sound dramatic. It’s just genuinely true that the button you’re about to click connects to something larger than the project itself.
A Thoughtful Reflection Before the FAQ
One of the things worth appreciating about GitHub’s design is that it defaults toward caution. You can’t accidentally give someone access — they have to be invited, and they have to accept. You can remove access anytime, and it takes effect immediately.
That design gives you room to make decisions without panic. Invite someone, see how it goes, adjust their permissions if needed, remove them if the project ends. The whole system is built around the idea that collaboration should be intentional and adjustable, not permanent and irreversible.
Which is, honestly, a pretty good model for how to work with other people in general.
FAQs
1. Do I need to be the repository owner to add collaborators?
You need to have Admin access. If you created the repository, you have Admin access automatically. If you’re a collaborator on someone else’s repository, you can only add people if you were given Admin permission.
2. The person says they didn’t get an invitation email. What should I do?
Tell them to check their spam folder — this is the most common explanation. You can also share the direct invitation link from the Collaborators page with them via chat or text. And if seven days have passed since the invite, you’ll need to resend it; the original link will have expired.
3. Can I add someone using just their email address, even if they don’t have a GitHub account?
Yes. GitHub will send them an invitation to that email, and they can create an account when they accept. The invitation email will walk them through signup if needed.
4. What’s the difference between a collaborator and a contributor?
A collaborator is someone you’ve explicitly given repository access to. A contributor is a broader term — it includes anyone who has submitted a pull request that got merged, even if they never had direct collaborator access. The terms aren’t interchangeable, though people often mix them up.
5. Can I change someone’s permission level after adding them?
Yes. Go back to Settings → Access → Collaborators, find their name, and adjust their permission level anytime. Changes take effect immediately — no new invitation needed.
6. How do I remove someone’s access?
Same place. Settings → Access → Collaborators. Click the trash icon or “Remove” option next to their name. Their access is revoked instantly. They don’t receive a notification that they’ve been removed.
7. Does adding someone to a public repo cost anything?
No. GitHub Free allows unlimited collaborators on both public and private repositories. Some paid organization plans may have seat costs for private repositories — check your plan details if you’re managing a team account.
8. What’s the difference between adding someone to a repo and adding them to a GitHub Organization?
Adding to a repo gives access to that specific repository only. Adding to an organization gives them membership in the whole organization, potentially with access to multiple repos. For most small projects, adding directly to the repo is all you need.
9. Can a collaborator delete my repository?
Only if they have Admin permission. With Read, Triage, Write, or Maintain access, they cannot delete the repository or change its most sensitive settings. Another good reason not to hand out Admin access casually.
10. I’m using GitHub for a class project. How should I add my classmates?
Ask your classmates for their GitHub usernames before your next meeting — it’s faster than hunting for them by email. Give everyone Write access. And if your instructor created the repo, ask them to add you first before trying to add others yourself.
11. What is a “pending invite” and how long does it last?
A pending invite means you’ve sent the invitation but the person hasn’t accepted yet. They have seven days to accept before the invitation expires. You can see all pending invites on your Collaborators page. If it expires, just click the resend button.
12. Can I add a whole team to a repository instead of individuals?
Yes — if you’re using a GitHub Organization, you can create Teams and assign those Teams to repositories. This is much more efficient for larger groups and means you only need to manage membership in the team, not permissions on every individual repo.
13. What’s the safest permission level to give a freelancer?
Writing is usually appropriate if they need to push code. If they only need to review or comment, reading is safer. Never give Admin to a short-term contractor unless there’s a very specific reason — you can always upgrade permissions later if needed.
14. Is there a way to add collaborators through the command line?
Yes. The GitHub CLI and GitHub API both support adding collaborators programmatically. Using gh api –method PUT /repos/OWNER/REPO/collaborators/USERNAME with the right parameters will do it. This is especially useful for automating onboarding across large teams.
15. What if the repository is private and the person claims they can’t see it?
First confirm that the invitation has been accepted — check the Collaborators page and make sure they appear as an active collaborator rather than showing “Pending.” If they accepted but still can’t see the repo, try having them log out and back into GitHub, or check that they’re signed into the correct GitHub account (people sometimes have multiple accounts).
Empowering curious minds to explore, learn, and think deeper with Fact Aura.