How to Set an Out of Office on Outlook: A Friendly Walkthrough
I want to save you the headache of hunting through menus right before you rush out the door for vacation. Setting an out of office message in Outlook takes about two minutes once you know where to look, but Outlook has a few different versions running around these days, and each one hides that setting in a slightly different spot.
Let’s walk through it together, calmly, so you can get this done and actually enjoy your time away.
Key Facts
| Detail | Info |
| Official Feature Name | Automatic Replies (also called Out of Office) |
| Who Can Use It | Microsoft 365, Exchange, and Outlook.com accounts |
| Who Can’t Use It Directly | POP or IMAP accounts (like Gmail connected through Outlook) |
| Time to Set Up | About 2 minutes |
| Where to Find It (New Outlook / Web) | Settings gear → Accounts → Automatic Replies |
| Where to Find It (Classic Outlook) | File → Automatic Replies (Out of Office) |
| Where to Find It (Mobile App) | Icon for your profile → Settings → Your account → Automatic Replies |
| Separate Message Options | Indeed, one for “Outside My Organization” and one for “Inside My Organization.” |
| Calendar Option | Create an all-day event and set “Show As” to Out of Office |
A Quick Word Before We Start
Outlook has been going through some real changes lately. The traditional version that many of us grew up on is gradually being phased away, particularly on Mac, as Microsoft has been pushing people toward what’s known as New Outlook. The toggle to switch back to legacy Outlook was removed in October 2025. Because of that shift, I’m going to walk you through every major version so you can find the exact steps that match whatever’s actually open on your screen right now.
See also “Understanding the Maryland Judiciary Case Search: Your Guide to Maryland’s Public Court Records“
What This Feature Actually Does
Automatic Replies, which almost everyone just calls “out of office,” sends a pre-written message to anyone who emails you while you’re away. You write it once, set your dates, and Outlook handles the rest quietly in the background, even if you close your laptop and don’t touch your email again until you’re back.
It’s a small feature, but it does real work. It tells clients not to panic when you don’t respond right away. It lets coworkers know who to contact instead. And it gives you a little bit of peace of mind, knowing your inbox isn’t just sitting there confusing people while you’re out.
Setting It Up in New Outlook for Windows or Outlook on the Web
If you’re using New Outlook or the web version at outlook.office.com, the steps are nearly identical, since Microsoft built them to match each other closely.
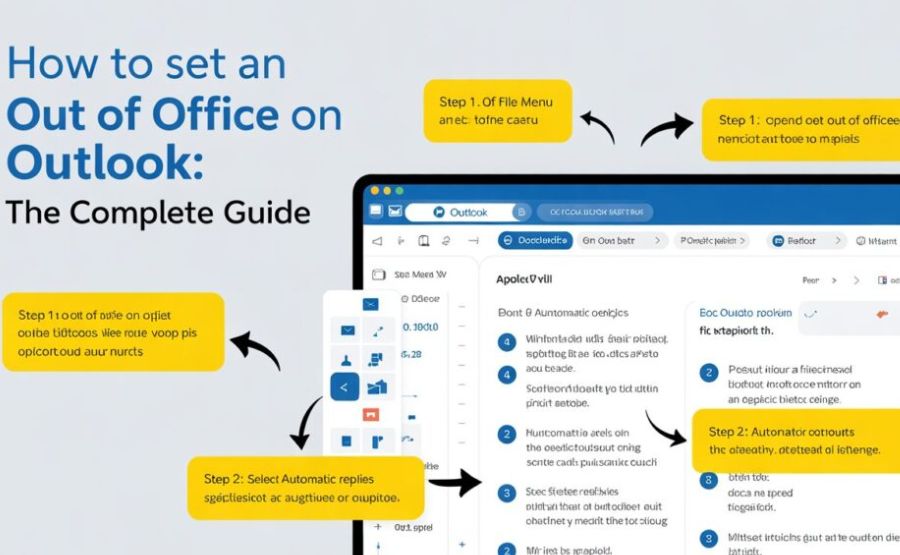
Start by clicking the Settings gear icon, usually tucked in the top-right corner of your screen. From there, go to Accounts, then select Automatic Replies. You’ll see a toggle labeled “Turn on automatic replies.” Switch it on.
If you want your message to turn off automatically on a specific date, check the box for “Send replies only during a time period” and fill in your start and end dates and times. This step matters more than people realize. Skip it, and your out of office reply will keep firing off to everyone long after you’re back at your desk, which gets confusing fast.
Type your message in the box under “Send automatic replies inside your organization.” If you also want people outside your company to get a message, check “Send replies outside your organization” and write a separate note for them. When you’re happy with everything, click Save, and you’re done.
Setting It Up in Classic Outlook
If your screen still shows the older ribbon layout with tabs like File, Home, and Send/Receive across the top, you’re on classic Outlook. This version uses a slightly different, dialog-box style setup.
Click File in the top-left corner. Click the Automatic Replies (Out of Office) button. In the dialog box that pops up, select “Send automatic replies.” If you’d like your message to stop automatically, check “Only send during this time range” and set your start and end times.
You’ll notice two tabs here too, one labeled “Inside My Organization” and another labeled “Outside My Organization.” Fill in your message under each tab depending on who you want to notify. Click OK when you’re finished, and your automatic replies are active.
One quick note if this button is missing entirely: that usually means your account type doesn’t support automatic replies, which brings us to a workaround I’ll cover a little further down.
Setting It Up on Outlook Mobile
Heading out and only having your phone handy? That works fine too. Open the Outlook app, tap your profile icon or initials in the top-left corner, then tap the Settings gear icon, usually sitting near the bottom-left of the screen.
Under your email accounts, tap the account you want to set this up for, then tap Automatic Replies. Toggle it on. If you want a specific time window, enable “Reply during a time period” and set your dates. Enter your message and select whether you want to respond to all recipients or just those within your company.
There’s a nice extra option here too. You can enable “Block my calendar” to automatically create an out-of-office calendar event, or “Clear my calendar” to decline meetings during your time away. Once everything looks right, tap the checkmark in the top-right corner to save.
Setting It Up on Outlook for Mac
Mac users have their own path, and it’s worth mentioning that Microsoft has been actively shifting this experience recently. As of October 2025, the option to switch back to the older legacy Outlook for Mac was removed, and that legacy version is set to stop working with Exchange Online entirely by October 2026. If you’re on a Mac right now, there’s a very good chance you’re already using New Outlook, whether you realized it or not.
In New Outlook for Mac, open Preferences, then click Accounts. Select your account and click Automatic Replies. Enable the feature and customize your message the same way you would on Windows, then click Save. If you happen to still be on the older legacy version for now, the path runs through Tools, then Out of Office, where you’ll check “Send automatic replies for account” and fill in your dates and messages from there.
What to Do If You’re Using a Personal Email Account
Here’s something that trips a lot of people up. Automatic Replies only works with Microsoft Exchange, Microsoft 365, and Outlook.com accounts. No matter which version you’re using, that little Automatic Replies button just won’t show up if you’ve connected a personal Gmail or Yahoo account to Outlook using POP or IMAP.
The good news is there’s a real workaround. You can build a rule instead. Start by writing a new email with your out of office message, then save it as an Outlook Template file. From there, go to File, then Manage Rules & Alerts, and create a new rule that replies to every message you receive using that template. Just remember one important catch: this rule-based method only works while Outlook stays open and running on your computer, since it doesn’t get handled by Microsoft’s servers the way true Automatic Replies does.
Don’t Forget Your Calendar
A lot of people set their automatic email reply and stop there, but there’s a second piece worth handling too. Setting your calendar status can prevent coworkers from accidentally booking meetings during your time away.
Open a new event in your Outlook calendar for the days you’ll be gone. Set it to an all-day event, or specific hours if you’re only out part of a day. In the “Show As” dropdown, select Out of Office. Give the event a clear title, something like “OOO: Vacation” works well, so anyone glancing at your calendar understands immediately what they’re looking at.
Writing a Message That Actually Helps People
Getting the settings right is only half of this. What you actually write matters just as much. A good out of office message tells people three things clearly: when you’re away, when you’ll be back, and who to contact if something urgent comes up while you’re gone.
Something simple works best. A short line thanking them for their email, the exact dates you’re out, a contact name and email for urgent matters, and a note that you’ll respond once you’re back. That’s really all it takes. You don’t need anything clever or complicated. Clear and short beats cute and vague every single time.
A Personal Reflection on Why This Small Habit Matters
I think out of office messages get treated like a throwaway chore, something you rush through on your way out the door. But there’s something genuinely thoughtful about them when you slow down and consider what they actually do. They protect your time away by managing other people’s expectations. They keep a client from wondering if they’ve been ignored. They tell a coworker exactly who to loop in instead of guessing.
A well-written one is a small act of consideration, even though it takes almost no effort to write.
Common Mistakes Worth Avoiding
The biggest mistake I keep seeing mentioned again and again is getting the return date wrong. People often mean “I’m back Monday morning,” but they set their reply to turn off Sunday night, which creates a confusing gap where colleagues think you’re already reachable when you’re really not. Double-check your start and end times before you save.
Another common mistake is setting an indefinite reply with no end date at all. It’s easy to forget about, and weeks after you’re actually back at your desk, people might still be getting a message saying you’re unavailable. Always set a clear end date if you know when you’re returning.
The Broader Impact of a Simple Feature
It’s easy to overlook how much a small feature like this actually shapes how workplaces run. With hundreds of millions of people using Outlook, and a growing share of them checking email primarily on their phones, a clear out of office message keeps entire teams moving smoothly, even when key people step away.
Without it, projects stall. Clients get anxious. Coworkers waste time guessing who’s covering what. A two-minute setup prevents all of that quietly, in the background, without anyone having to think about it twice.
Common Misconceptions About Automatic Replies
Some people assume automatic replies only fire once per sender. In most setups, Outlook does send a reply just once to each unique person during your away period, rather than replying to every single email from the same person over and over, which helps avoid spamming your own contacts unnecessarily.
Other people assume this feature works the same for every account type. As we covered above, that’s simply not true. Personal POP or IMAP accounts need the rule-based workaround instead of the built-in toggle.
Final Words
Microsoft continues shifting more of its Outlook experience toward New Outlook, both on Windows and Mac, which means the classic dialog-box version most of us are used to will likely keep fading out over the next couple of years. The core idea behind automatic replies probably isn’t going anywhere, but exactly where that button lives on your screen will probably keep shifting for a little while longer.
FAQs
1. Where do I find the out of office setting in New Outlook?
Click the Settings gear icon, go to Accounts, then select Automatic Replies.
2. Where do I find it in classic Outlook?
Click File in the top-left corner, then select Automatic Replies (Out of Office).
3. Can I use this feature with a personal Gmail account connected to Outlook?
Not directly. Automatic Replies only works with Exchange, Microsoft 365, and Outlook.com accounts. Gmail or Yahoo accounts connected via POP or IMAP need a rule-based workaround instead.
4. How do I set up the rule-based workaround for non-Exchange accounts?
Create a new email with your message, save it as an Outlook Template, then go to File, Manage Rules & Alerts, and set up a rule to reply to every message using that template.
5. Will my automatic reply turn off by itself?
Only if you set a specific end date and time. Without one, it keeps running until you manually turn it off.
6. Can I write different messages for coworkers and outside contacts?
Yes. Outlook lets you set a separate message under “Inside My Organization” and another under “Outside My Organization.”
7. Does automatic replies work if I close my laptop?
Yes, for Exchange, Microsoft 365, and Outlook.com accounts, since the feature runs on Microsoft’s servers rather than your device.
8. How do I set it up on my phone?
Tap your profile icon, then the Settings gear, select your account, tap Automatic Replies, toggle it on, and fill in your dates and message.
9. Can I block my calendar at the same time?
Yes. On mobile, you can enable “Block my calendar” to automatically create an out-of-office event, or “Clear my calendar” to decline existing meetings.
10. How do I mark my calendar as out of office separately from my email reply?
Create a new event for your away dates, set it as all-day or specific hours, and choose “Out of Office” under the Show As dropdown.
11. What’s changing with Outlook for Mac?
The option to switch back to legacy Outlook for Mac was removed in October 2025, and legacy Outlook will stop working with Exchange Online entirely by October 2026, meaning most Mac users are shifting to New Outlook.
12. What should I include in my out of office message?
The dates you’re away, when you’ll be back, and a contact person for anything urgent. Keep it short and clear rather than overly detailed.
13. Do I need administrator permission to set this up myself?
No. Individual users can set their own automatic replies without needing any special administrator access.
14. Can I set up an out of office for a shared mailbox?
Yes, but you’ll first need to add the shared mailbox as an account, which requires Full Access permission.
15. What’s the most common mistake people make with this feature?
Getting the return date or time slightly wrong, which creates a confusing gap where people think you’re back before you actually are.
Empowering curious minds to explore, learn, and think deeper with Fact Aura.